

The Ultimate Guide to the Red Dot AR-15 Carbine (2026 Setup)
Building a modern rifle means shedding unnecessary bulk.
Key Takeaways
- The 1x magnification of a red dot lets you shoot with both eyes open, preserving full peripheral vision — its core advantage over magnified scopes at close-to-mid range.
- Absolute co-witness aligns the dot with iron-sight beads (same sight picture on both); lower 1/3 stacks the dot above the irons leaving most of the window unobstructed — pick by which sight you will trust as primary.
- Top-load battery trays let you swap a CR2032 without dismounting the optic — the difference between maintaining your zero and re-zeroing every 50,000 hours.
- The RMR footprint is the de facto industry standard for carbine red dots; choosing it now keeps your upper compatible with future optic upgrades and adapter plates.
- Optic weight on the upper receiver shifts balance and slows target transitions — go lighter on a patrol/duty rifle, heavier is acceptable on a static range setup.
What is an AR-15 Red Dot Carbine Setup?
An AR-15 red dot carbine setup is a short-barreled (typically 16-inch) AR-15 paired with a 1x magnification reflex sight mounted on a Picatinny rail. The combination prioritizes fast target acquisition at distances from 0 to 200 yards over long-range precision.
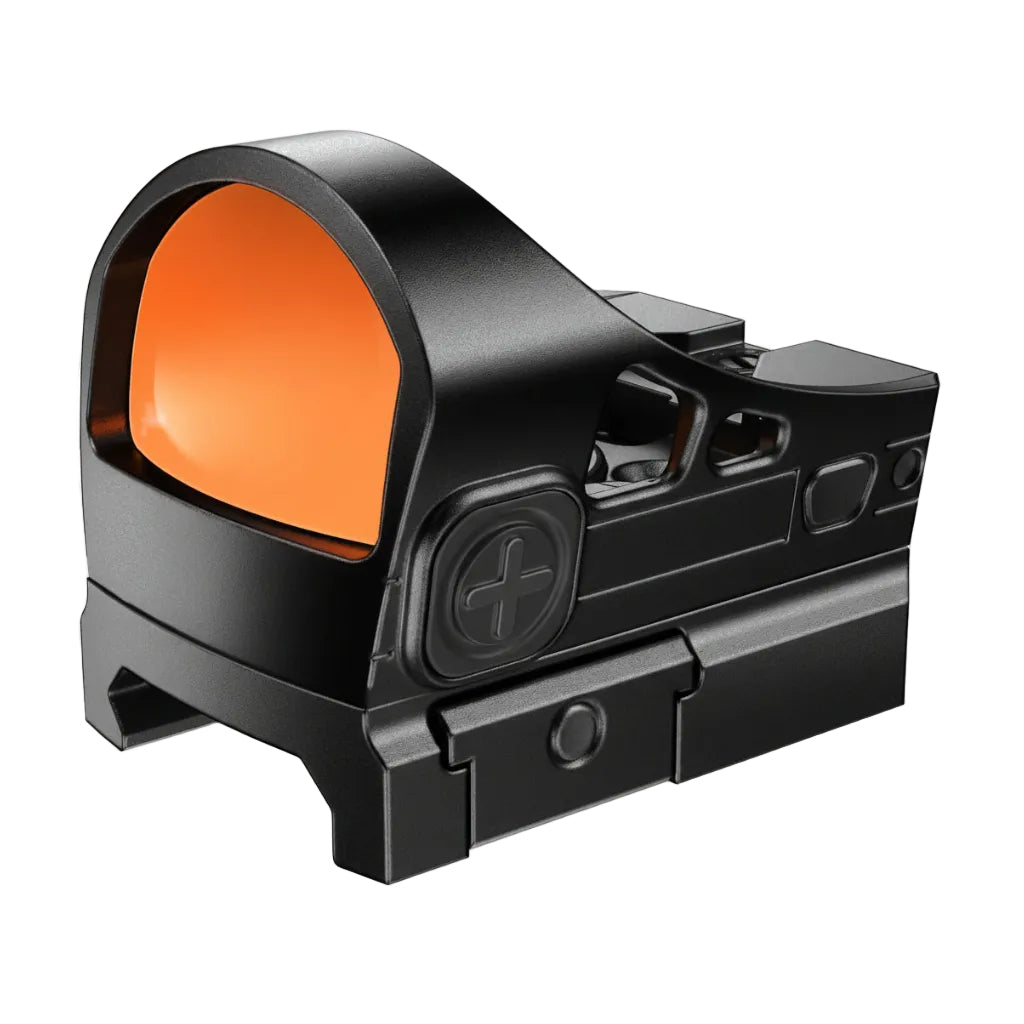
The "1x" part matters more than most buyers realize. Because the optic adds zero magnification, you can shoot with both eyes open, which keeps your full peripheral vision active. That's the practical advantage over a traditional scope at close-to-mid range.
The Picatinny rail is the mechanical backbone of the whole system. It's a standardized MIL-STD-1913 mounting interface that lets you swap optics in minutes without special tools or gunsmithing.
A 3 MOA dot covers roughly 3 inches at 100 yards. That's precise enough for accurate hits while still being easy to find under stress.
The result is a carbine you can run effectively in a home-defense hallway or on a 100-yard range target without changing anything about the setup.
Understanding the basic setup is just the beginning; the real performance gains come from managing the physical mass at the front of your rifle.
The Physics of Optic Weight on Carbine Handling
A sub-30g optic improves target transition speed by reducing the moment of inertia at the rail, which directly controls how fast the muzzle accelerates between targets. The lighter the mass sitting forward of the receiver, the less rotational resistance your wrists and shoulders fight during each swing.
Legacy tube sights like a full-size 1-4x LPVO typically weigh 400–600g with a mount. That extra mass sits 3–4 inches ahead of the receiver's center of gravity, multiplying its effective resistance through the lever-arm effect. Your muscles don't just feel the weight — they feel the weight multiplied by distance.
A 30g chassis like the AZV PCO Mini Reflex Red Dot Sight keeps that forward mass negligible. The rifle's balance point stays closer to the pistol grip, where your strong hand naturally anchors. You swing the whole rifle rather than fighting a muzzle-heavy pendulum on every transition.

Forward rail mass is a primary driver of muzzle-heavy fatigue during sustained drills. Shooters often blame their grip or stance when the real issue is optic placement and mass.
Swapping a heavy tube sight for a compact 30g reflex on the same lower noticeably tightens split times between targets during transition drills. Over a multi-target course that advantage adds up fast.
The open-emitter design helps too. Without a tube to align your eye through, you get a wider field of view and faster dot acquisition. Your eye finds the dot instead of hunting for the tube's exit pupil under movement.
If muzzle-heavy fatigue is cutting into your stage times or wearing out your support arm during longer range sessions, a lightweight reflex sight is worth a close look before you blame your conditioning.
Once you have minimized the weight on your rail, the next critical step is aligning that lightweight optic with your backup iron sights.
Absolute vs. Lower 1/3 Co-Witness Explained
The mechanical difference comes down to where your iron sights appear inside the optic window. With absolute co-witness, your front post and rear sight sit dead center in the glass, perfectly aligned with the red dot. With lower 1/3 co-witness, the irons drop to the bottom 30% of the window, leaving the upper two-thirds of the glass clear.
On a standard flat-top AR-15 with a Picatinny rail, absolute co-witness typically requires a mount height of around 1.41 inches from rail to center of the optic. Lower 1/3 co-witness usually needs roughly 1.54 to 1.93 inches, depending on the specific riser.
What Absolute Co-Witness Actually Looks Like
Mount up at absolute height and you'll see the front post sitting right in the middle of your dot. It's clean confirmation that your irons and optic are tracking together. The tradeoff is that the post can visually clutter your sight picture during fast target acquisition.
This height works well for shooters with a low, flat cheek weld on a standard stock. If your face naturally drops close to the buffer tube, absolute height keeps everything lined up without forcing your head position.
What Lower 1/3 Co-Witness Actually Looks Like
At lower 1/3 height, the irons tuck below your primary field of view. You get a cleaner window for the red dot, and the front post only appears if you consciously look for it. Most shooters running modern carbines prefer this setup for exactly that reason.
The added height also lets you keep a more upright head position. That reduces neck strain on long range sessions and clears bulky gear like gas masks or night vision devices that sit forward on your face. If you're running any kind of head-mounted equipment, lower 1/3 is the practical choice.
Which Height Fits Your Setup
| Feature | Absolute Co-Witness | Lower 1/3 Co-Witness |
|---|---|---|
| Iron sight position in glass | Center of window | Bottom third of window |
| Sight picture clutter | More (post visible at all times) | Less (post mostly out of view) |
| Head position required | Low, flat cheek weld | More upright, relaxed |
| Gear compatibility | Standard use | Better with NVGs or gas masks |
Pick absolute height if you shoot with a very low cheek weld and want constant iron sight confirmation. Go lower 1/3 if you want a cleaner dot picture and a head position that doesn't punish you after two hours at the range. If you're unsure how to properly align these, check out our detailed guide to learn how to zero your optic effectively.
Perfect sight alignment won't matter if your optic loses its zero every time you change the battery.
Top-Load Battery Trays and Zero Retention
A top-load battery compartment lets you swap a dead CR2032 without removing the optic from your Picatinny rail. The optic stays torqued to the same mount position, so the zero you dialed in at the range stays exactly where you left it.
Side-load designs are the problem. To access the battery on many older optics, you loosen the mount, slide the unit off the rail, pop the tray, replace the cell, then remount. Every time you break that interface, you introduce small positional variables that add up to real misses downrange.
Side-load optics can cost you a full zeroing session after a routine battery swap, since the unit has to come off the rail and go back on. That's a real cost in time and ammunition.
A modern solar-backed reflex sight uses a top-load battery tray. You access the CR2032 from the top of the housing with the optic fully mounted. No tools, no rail removal, no re-zero session.
Here's the swap procedure that keeps your zero intact:
- Keep the optic mounted. Leave all mount screws torqued to spec. Do not touch the base.
- Open the top-load tray. Use a coin or flathead to turn the battery cap counterclockwise.
- Seat the new CR2032 positive-side up. Press firmly until the cap threads catch cleanly.
- Close and verify. Snug the cap finger-tight, then a quarter-turn with the coin. Power on and confirm the dot appears at expected brightness.
- Spot-check at 25 yards. Fire one round at your established zero target. If the hit is where you expect, you're done.
That last step matters. Even with a top-load design, a quick confirmation shot costs one round and takes 90 seconds. Skipping it entirely is the only thing that actually wastes ammo.
Maintaining zero is important, but standardizing that reliable sight picture across all your firearms takes your training efficiency to the next level.
Standardizing Your Sight Picture with the RMR Footprint
Running the same RMR footprint on both your pistol and your AR-15 carbine cuts training time because your eyes and hands learn one sight picture instead of two. When the dot size, window dimensions, and reticle position stay consistent across platforms, your brain stops recalibrating every time you transition.
The practical mechanism is simple. Mount an RMR-footprint optic on your pistol slide, then use a Picatinny rail adapter to seat the same footprint on your carbine's flat-top receiver. The Accufire RMR Plate for Reddots and Rifle Scopes runs $9.99 and handles exactly this crossover, letting you drop an RMR-pattern red dot onto a standard Picatinny rail without a machinist or a gunsmith.
A quality RMR-footprint optic sits on an RMR footprint and ships with a Picatinny rail attachment built in. Its 28×17.5mm window and 3 MOA dot are the same whether it's on a factory-cut slide or a carbine rail. You're not relearning a new window size or a new dot when you pick up the rifle.
Shooters who switch between platforms without standardizing often report losing half a second or more on target acquisition during transitions. That gap closes when the dot is in the same relative position and the same visual size on both guns. Muscle memory transfers directly.
One thing worth knowing from range experience: the eye relief demands differ between a pistol and a carbine, so your cheek weld and presentation angle will still need separate practice. The footprint standardizes the optic, not the shooting position. Budget your dry-fire time accordingly, and the crossover benefit shows up quickly on the clock.
How to Judge a Carbine Red Dot
Two concrete benchmarks matter most for a carbine red dot: weight relative to traditional tube sights, and mechanical zero retention across battery service cycles.
Sub-30g open reflex designs weigh far less than conventional tube-style red dots, which typically run 150g or heavier. The weight difference shows up immediately in muzzle-forward balance during extended drills.
Zero retention comes down to the battery tray. A top-load tray lets you swap a CR2032 without disturbing the mount, so the optic never leaves the rail. Bottom-load designs require dismounting, which introduces re-zero variance each time.
Other things worth checking: how quickly Shake Awake brings the dot back across power cycles, whether you can reach the battery compartment with gloves on, and whether the mount footprint matches RMR or RMSc cut dimensions.
With those criteria in mind, here is exactly how we recommend configuring your rifle.
What We'd Do
Mount a sub-30g optic on an RMR-footprint Picatinny adapter and zero it at 50 yards. That single setup covers 0-to-200-yard engagements without holdover math slowing you down.
Pick an optic with a top-load battery tray. You can swap a CR2032 in under 30 seconds without pulling the optic off the rail, which means your zero stays put every time. A reliable open-emitter reflex sight checks both boxes: RMR footprint, top-load tray, 3 MOA dot, and a 28×17.5mm window that's wide enough to find targets fast under stress.
Run lower 1/3 co-witness iron sights underneath. Your cheek weld stays natural, and irons are there if the optic ever fails at a bad moment.
Keep the setup simple. One optic, one mount, irons as backup. Shooters who chase complexity usually end up with a heavier rifle and a slower first shot. The lightest rig that holds zero under recoil is the one worth trusting.
Frequently Asked Questions
What is the effective range of a red dot on an AR-15?
A standard 1x red dot on an AR-15 is highly effective from 0 to 200 yards. With proper zeroing and a solid understanding of your ballistic trajectory, hits out to 300 yards are possible, though target identification becomes challenging without magnification.
Do I need backup iron sights with a red dot?
While modern red dots are incredibly reliable, electronic devices can fail. Running backup iron sights (BUIS) in a lower 1/3 co-witness configuration provides a fail-safe aiming method without cluttering your primary sight picture.