

LPVO Mount Without Losing Co-Witness: The 2026 Guide to Rapid Transitions
Many shooters search for an lpvo mount without losing co-witness, hoping to keep their iron sights usable through a magnified optic. What is an LPVO co-witness setup? It is an optical configuration attempting to align backup iron sights (BUIS) within the field of view of a Low Power Variable Optic at 1x magnification. However, due to the physical constraints of focal planes and scope tube geometry, achieving a true co-witness through an LPVO is optically impossible. Instead of chasing a physical impossibility, modern rifle setups focus on building highly effective rapid-transition systems. By utilizing offset or piggyback secondary red dots, you can maintain a reliable 1x backup without compromising your primary magnified optic. This guide breaks down the optical physics behind the co-witness myth and shows you how to properly configure a dual-optic system for maximum speed and reliability.
Key Takeaways
- True co-witness with an LPVO is mechanically impossible — the magnified glass sits too high above the rail and eye relief geometry does not align with iron-sight planes.
- Two viable workarounds: piggyback red dot (mounted on top of the LPVO scope tube) or 45-degree offset red dot (mounted to the side rail).
- Piggyback is faster to acquire (no rifle cant) but sits 1.5-2 inches above the rail, ruining cheek weld; recommended only for static positions.
- 45-degree offset requires a quick cant of the rifle but preserves natural cheek weld at zero magnification — the SOP for dynamic patrol and competition shooters.
- Either backup adds 4-7 oz to the upper; budget your weight tolerance before choosing.
What is an LPVO Co-Witness Setup?
Co-witnessing with an LPVO means your backup iron sights (BUIS) are visible through the scope's ocular lens at 1× magnification, giving you a mechanical fallback if the optic fails. It sounds straightforward, but the geometry makes it harder than it looks.
On a standard red dot, co-witness is simple: the sight sits low, your irons align through the window, done. An LPVO changes the equation because the scope tube is physically wider and the optical axis sits higher off the rail by default.
There are two accepted co-witness positions. Absolute co-witness places your iron sights dead-center in the scope's field of view. Lower 1/3 co-witness drops them to the bottom third, keeping the center of the reticle clear for target acquisition while the irons remain visible as a reference. Most serious AR-15 setups run lower 1/3 for exactly that reason.
Here's where the LPVO problem shows up: most standard-height LPVO mounts position the optical axis too high for irons to appear anywhere in the field of view at 1×. You end up looking through the scope and seeing nothing but reticle and target — your BUIS are below the sight picture entirely.
Scopes like the EVRO-12 series are designed with a specific tube height in mind, and the mount you pair them with determines whether co-witness is even achievable. Getting the mount height right is the whole game.
Understanding the mechanical height is only half the battle; the real barrier to co-witnessing lies in how light travels through the glass.
Why Can't You Co-Witness an LPVO with Iron Sights?
Iron sights blur, distort, or vanish through an LPVO because the optic's lens system is designed to focus at a specific distance — typically the target plane — and your front sight post sits well inside that focal range. Your eye cannot simultaneously resolve two objects at different focal distances through a single magnified optical path.
The front sight post is roughly 15–18 inches from your eye. The LPVO's objective lens is focused hundreds of yards downrange. When you look through the scope, the glass pulls your eye's focus outward. The front sight becomes a blurry smear, not a usable reference.
The 1x Magnification Myth
Here's where most buyers get burned. That "1x" setting on an LPVO is rarely a mathematically perfect 1.0x. Most LPVOs at their lowest power setting run closer to 1.05x–1.15x. That small deviation is enough to create parallax shift and distort the apparent position of iron sights viewed through the tube.
A true 1x red dot works because there's no magnification math involved — the emitter projects a dot onto a single lens plane. An LPVO at "1x" still routes light through multiple lens groups. Those groups introduce focal plane diopter distortion that a front sight post simply cannot survive intact.
Eye Relief Makes It Worse
LPVOs typically demand 3.0–3.5 inches of eye relief. The Accufire ATRO-20, for example, specifies 3.22–3.5 inches. That fixed standoff distance locks your eye into a position where the iron sight's sight picture geometry collapses entirely.
This is a common report from shooters who mount BUIS under an LPVO: at the optic's focal distance the front sight post blurs into an indistinct smear rather than a usable reference. That's not a mount height problem. That's optical physics.
The short version: LPVOs and iron sights occupy incompatible focal worlds. Solving the co-witness problem means working around the optic's geometry, not through it.
Since looking through the scope tube won't work for backup sights, the most reliable solution is moving the secondary optic entirely outside the LPVO's optical path.
The Piggyback Red Dot Configuration
Mounting a red dot directly on top of your LPVO scope ring solves the transition problem by giving you two independent aiming systems at two different heights — you use the magnified scope for distance work and drop your eye to the red dot for anything close and fast. No magnification to dial down, no reticle to hunt. The dot is just there.
The key to making this work is footprint standardization. Scope ring manufacturers machine RMR-pattern cuts into their top surfaces specifically for this purpose. The RMR footprint guarantees you can mount the dot exactly where your eye naturally falls on standard scope ring adapters, so you're not improvising a solution with shims and prayers.
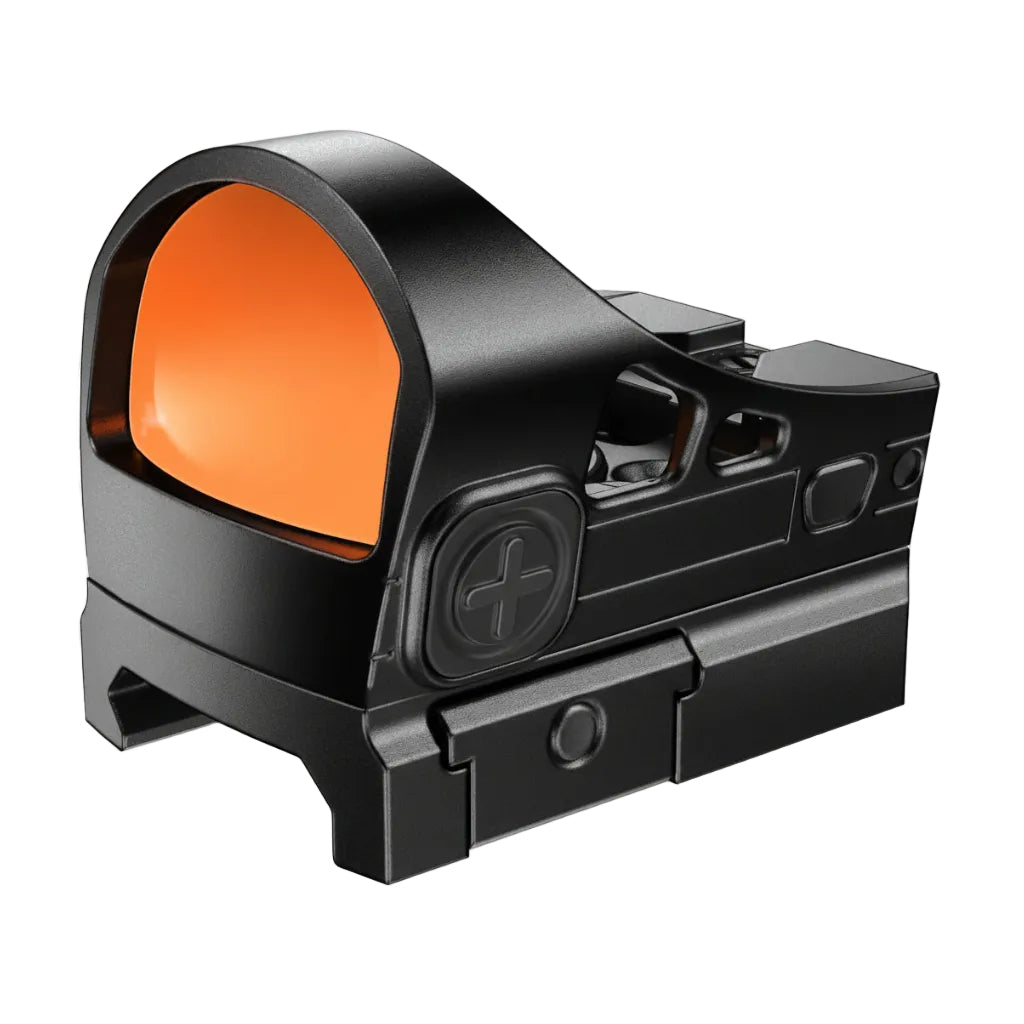
The AZV PCO-S with Base ($249.99) fits this role well. Its 28×17.5mm window is wide enough that you can find the dot quickly even with a slightly off-angle head position — useful when you've just pulled your eye off a magnified scope and your cheek weld isn't perfect yet. The solar backup also means you're not chasing a dead battery during a long range day.
Height matters here. A piggyback dot sits roughly 2 to 2.5 inches above bore, which is higher than a standard flat-top red dot setup. You need to account for that offset at close range — typically 2 to 3 inches of hold-under inside 25 yards. It's a real number worth knowing before you need it.
For the adapter hardware itself, Accufire's RMR Plate for Red Dots and Rifle Scopes runs $9.99 and gives you a clean interface between the scope ring and the dot's footprint. Cheap insurance against a loose mount that walks zero over a range session.
The stacked configuration adds weight and height but keeps both optics on the same rail axis, which is simpler to zero and maintain than a canted offset mount.
If stacking optics vertically creates too much height for your shooting style, rolling the secondary sight to the side offers a fast, low-profile alternative.
The 45-Degree Offset Mount System
Rolling your rifle 45 degrees gives you a dedicated close-quarters optic without ever touching your LPVO's magnification ring. Your cheek weld shifts slightly, your dominant eye drops to the offset red dot, and you're on target at 10 yards in under a second — faster than dialing down to 1× and reacquiring through the main tube.
The biomechanics are straightforward. You rotate the rifle inward toward your body, keeping the stock planted on your shoulder. Your head barely moves. That's the whole point: the transition happens in the gun, not in your body.
Why Offset Beats Looking Over the Scope
Looking over a magnified optic forces you to break cheek weld entirely and shift your eye line above the tube. At CQB distances that costs you a full second or more. Offset wins at close range when speed matters.
The 45-degree roll is a repeatable, trainable motor pattern that holds up under stress. Looking over the scope is not.
Optic Readiness at 45 Degrees
Your offset red dot needs to be on the instant you rotate. A dot that's sleeping when you roll the rifle costs you everything the offset system just saved you.
The AZV PCO-S with Base ($249.99) addresses this directly. Its Shake Awake technology wakes the optic the exact millisecond you rotate the rifle, so you never manually activate it mid-transition. The 4-minute static auto-sleep keeps the battery alive between drills without any manual intervention.
The 3 MOA dot is the right size here — tight enough for a precise 25-yard shot, fast enough to find at arm's length. And the top-loading battery compartment means you swap a CR1632 in the field without disturbing your zero or pulling the sight off the mount.
One practical note: mount your offset optic at the 9 o'clock or 3 o'clock position depending on your support hand, and confirm zero at 25 yards after the mount is torqued down. The offset angle introduces a small parallax shift that needs to be accounted for at close range before you run any timed drills.
Both mounting strategies solve the backup optic problem, but choosing between them comes down to your specific biomechanics and tactical requirements.
Piggyback vs. Offset Mounts for Rapid Transition
Offset wins for CQB and ambidextrous shooters; piggyback wins for passive night vision aiming and shooters who want a single cheek weld position. Your body mechanics and mission profile decide which one actually works.
Cheek Weld vs. Chin Weld
Piggyback mounts stack a red dot directly above the LPVO tube. You stay on your cheek weld, which keeps your head position consistent between 1× and magnified shots.
Offset mounts drop you to a chin weld — you tilt the rifle roughly 45 degrees and press your chin forward to acquire the dot. That head movement adds about half a second in timed drills, which matters at close range.
Ambidextrous Shooting and Night Vision
Passive night vision aiming highlights a real problem with piggyback configurations: it requires the dot to sit close to bore height, and a stacked mount pushes the secondary optic high enough to break that geometry. Offset mounts keep the dot lower and maintain a workable passive aiming angle.
Left-handed shooters also run into trouble with right-side offset mounts. A piggyback dot stays centered and works equally well from either shoulder.
Transition Speed and CQB Reliability
A well-practiced offset shooter can acquire a 3 MOA dot in under a second at 7 yards. More importantly, a mounted secondary optic eliminates QD failure as a variable entirely — you never need to break zero on a backup optic during a CQB scenario because the dot is always live.
| Factor | Piggyback | Offset (45°) |
|---|---|---|
| Head position | Cheek weld (consistent) | Chin weld (requires tilt) |
| Ambidextrous use | Yes | Limited (side-specific) |
| Passive NV aiming | Poor (too high) | Good (lower dot position) |
| CQB transition speed | Moderate | Fast with practice |
| Weight added | Higher | Lower |
If you shoot from both shoulders or run night vision regularly, go offset. If you want a single consistent head position and shoot right-handed only, piggyback keeps your fundamentals tighter across all magnification ranges.
Putting It All Together
A well-built LPVO system gives you magnified precision at distance and a fast secondary dot for close work — stop chasing co-witness and start building for rapid transition instead.
Pick your mount height based on your cheek weld, then add a piggyback or offset red dot that stays live when the LPVO is dialed up. The AZV PCO-S with Base at $249.99 fits this role well: its Shake Awake technology means the dot is ready the moment you rotate to it, and the solar backup keeps it running through long range days without a battery swap.
The 28×17.5mm window gives you a generous sight picture even under stress. That matters when you're swinging from a 6× zoom to a contact-distance target in under a second.
Get your LPVO zeroed first. Then zero the secondary dot independently at your chosen close-range distance — typically 50 yards works for most carbine setups. Confirm both zeros hold after 50 rounds of recoil.
After that, the system runs itself. You'll reach for the right optic by instinct, not by thinking about it.
Conclusion
Ultimately, achieving an lpvo mount without losing co-witness is an optical hurdle that modern shooters bypass entirely through dual-optic configurations. By embracing offset or piggyback systems, you maintain the full magnified power of your primary scope while keeping a dedicated 1x aiming solution ready at a moment's notice. If you are refining your rifle's setup, taking the time to explore RMR-footprint red dots and proper mounting plates will ensure your hardware matches your training.
When the geometry is correct and the zeros are confirmed, the mechanics fade into the background. You are left with a highly capable, rapid-transition platform that allows you to instinctively engage targets at any practical distance, fully prepared for whatever the environment demands.
Last Updated: April 2026
Why Trust This Guide
This guide is maintained by the Accufire Editorial Team.
Frequently Asked Questions
Can you absolute co-witness an LPVO?
No. Due to the focal plane geometry and eye relief requirements of a Low Power Variable Optic, iron sights will appear as a blurry, unusable distortion even at a 1x setting. You cannot achieve an absolute co-witness through an LPVO.
What is the best backup sight for an LPVO?
The most effective backup sight for an LPVO is a micro red dot mounted either in a piggyback (top ring) or 45-degree offset configuration. This provides an instant 1x aiming solution without interfering with the primary scope's magnification.