

Best Red Dot Magnifier Combo Carbine Setup Guide (2026)
What is a red dot magnifier combo carbine setup? It is a dual-optic configuration that pairs a 1x reflex sight with a flip-to-side magnifier mounted directly behind it on a rifle's upper receiver. This system allows shooters to instantly transition between close-quarters target acquisition and mid-range precision without changing weapons.
Building a reliable red dot magnifier combo carbine requires more than just slapping two optics on a rail. You have to master footprint compatibility, calculate precise mounting heights, and implement modern power management strategies to ensure smooth mid-range transitions. Whether you are running drills at 50 yards or pushing out to 300 yards, the right alignment prevents scope shadow and keeps your reticle crisp. In this guide, we break down the math behind co-witness heights, the truth about eye relief, and how solar-backed optics are changing battery management for duty and range rifles alike.
What is a Red Dot Magnifier Combo for a Carbine?
A red dot magnifier combo pairs a 1x reflex or red dot sight with a flip-to-side magnifier, typically 3x or 5x, mounted directly behind it on the carbine's rail. The red dot handles close-quarters work at 1x; swing the magnifier into position and you can read targets out to 300 yards or beyond without swapping optics.
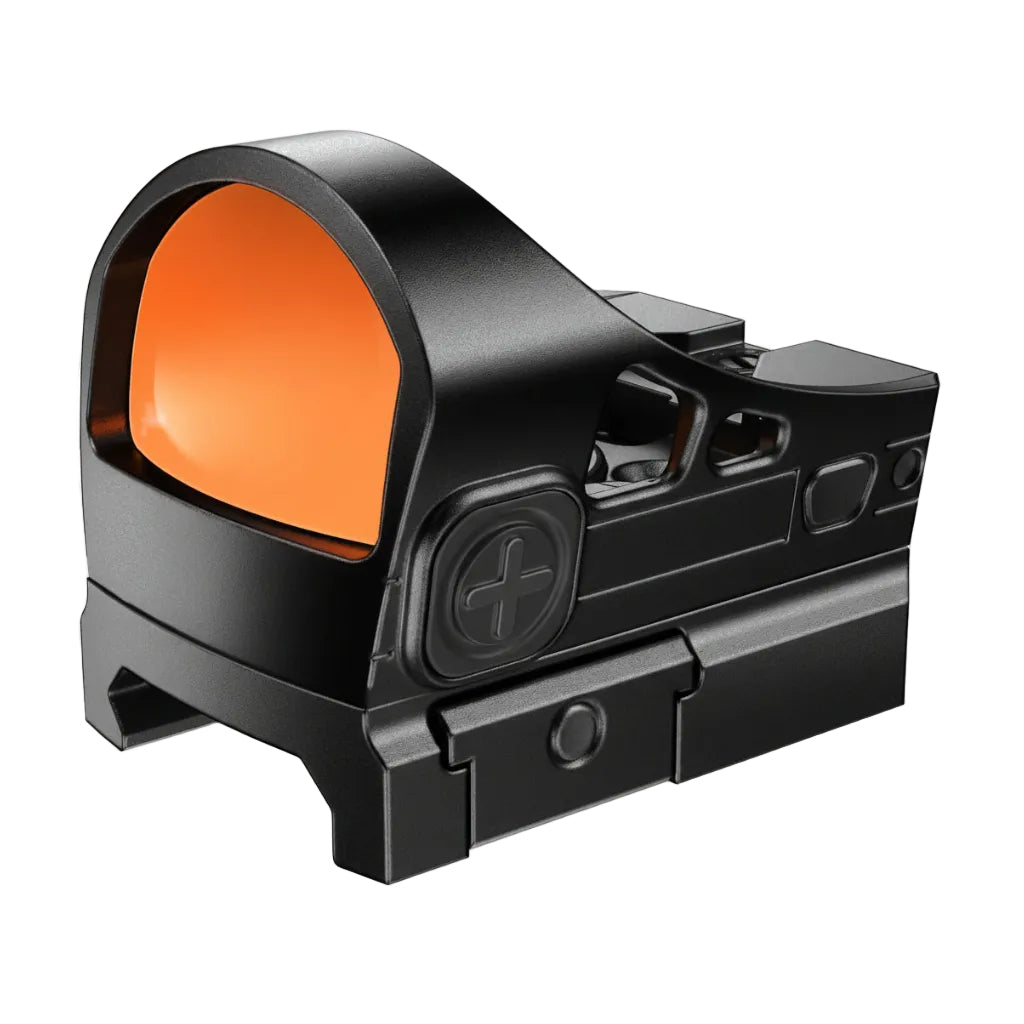
The setup lives on a flat-top AR or similar carbine platform because you need enough rail space for both units, usually 4 to 5 inches of continuous Picatinny. Weight runs roughly 12 to 18 ounces combined, depending on the magnifier body and mount choice.
What makes this practical on a carbine is speed. Flipping the magnifier out of the way takes under a second, so you're not fumbling with a scope turret when a target steps inside 50 yards. At distance, the magnifier snaps back in and the red dot reticle stays centered in the glass.
It's a proven middle-ground solution for shooters who run a single carbine across varied distances, from room-clearing drills to field-length shots, without carrying two separate rifles.
Understanding the basic mechanics is only the first step; the real challenge lies in aligning the two optics perfectly.
The Math Behind Footprint Compatibility and Mounting Heights
To align a red dot with a magnifier on a carbine rail, the optical centerline of your red dot must sit at the same height as the optical centerline of your magnifier. Get that wrong by even a few millimeters and you're chasing a dot that floats above or below the magnifier's exit pupil — frustrating and slow to diagnose at the bench.
The calculation starts with your magnifier's optical center height, measured from the top of the Picatinny rail. Most 3x flip-to-side magnifiers center around 1.54 inches above the rail. Your red dot mount needs to match that number.
Absolute Co-Witness vs. Lower 1/3 Co-Witness
Absolute co-witness puts your iron sights dead-center in the red dot window, typically at 1.54 inches above the rail. Lower 1/3 co-witness raises the optic to roughly 1.70 inches, pushing irons to the bottom third of the window for a cleaner sight picture.
The problem most shooters run into: they pick a mount height for co-witness with irons, then bolt on a magnifier without checking whether the magnifier's optical center matches. A 1.70-inch mount on the red dot paired with a 1.54-inch magnifier center means you're looking through the top edge of the magnifier's lens. You'll see a blurry crescent instead of a clean dot.
How Picatinny Adapters Change the Math
A Picatinny adapter adds height. On an RMR-footprint optic, the adapter plate typically contributes 0.25 to 0.35 inches of additional rise above the base. That's not trivial — it can push a red dot from absolute co-witness height into lower 1/3 territory without you realizing it.
The Accufire PCO series uses an RMR footprint and ships with a Picatinny rail adapter that includes a built-in co-witness channel. That channel is there specifically so you can mount the optic at the height needed to align with your magnifier while keeping a visual reference point for faster transitions. Standard product specs confirm the 28×17.5mm window, which gives enough glass real estate to stay usable even if your alignment is slightly off.
Explore optics with co-witness channels to simplify your magnifier alignment process.
Shooters often blame the magnifier for poor image quality when the actual problem is a 2–3mm height mismatch between the two optics. Measure both optical centers before you torque anything down.
| Mount Height (above rail) | Co-Witness Type | Notes |
|---|---|---|
| 1.54 in | Absolute | Irons centered in window; standard magnifier optical center |
| 1.70 in | Lower 1/3 | Cleaner sight picture; verify magnifier center matches |
| 1.54 in + adapter (~0.30 in) | Effectively Lower 1/3 | Adapter plate adds height; recalculate before mounting |
Measure twice. Stack your adapter plate height, your optic base height, and your magnifier center height on paper before anything goes on the rail. Five minutes of arithmetic saves an afternoon of troubleshooting.
Once your heights match on paper, you need to translate that alignment to the physical rail space on your rifle.
Eye Relief and Rail Placement: Setting Up the Flip-to-Side
Place your red dot as far forward on the upper receiver rail as the mount allows, then position the magnifier directly behind it with roughly 2.5 to 3 inches of clearance between the magnifier's rear lens and your shooting eye. That spacing is the standard eye relief window for most 3x flip-to-side magnifiers, and getting outside it is exactly what causes scope shadow when you flip the magnifier into line under pressure.
Count Slots Before You Torque Anything
Start at the front of the upper receiver rail, not the handguard. Bridging a mount across the receiver-to-handguard junction introduces flex, and flex means your zero shifts every time you torque the handguard during a cleaning session.
- Dry-fit the red dot first. Slide it forward until the rear of the mount sits at least one full slot back from the receiver's front edge. This keeps the mount body entirely on the receiver.
- Set the magnifier directly behind it. No gap between the two mounts is necessary; butting them together is fine. What matters is that the magnifier mount also stays on the receiver rail, not bridging onto the handguard.
- Check your eye relief before tightening. Get behind the rifle in your normal shooting stance. You want a full, edge-to-edge sight picture with zero black ring around the glass. If you see a dark halo, slide the magnifier rearward one slot at a time until it clears.
- Confirm the flip clears your support hand. Rotate the magnifier to the side slowly. It should swing free without contacting your handguard or any accessories mounted at the 3 or 9 o'clock position.
- Torque to spec and re-verify. After tightening both mounts, shoulder the rifle again and flip the magnifier in and out five times quickly. The dot should reappear centered every time.
Why Eye Relief Breaks Under Stress
At the bench you naturally find the right head position. Under stress, your head drives forward and your eye gets closer to the glass. Shooters commonly lose the dot entirely on a timed drill when the magnifier is mounted too close. Moving the whole stack forward by a couple of rail slots typically fixes it.
If your carbine has a 15-inch or longer handguard, you may feel tempted to push the red dot onto the handguard for a longer sight radius. Resist that. Keep both optics on the upper receiver for a stable, consistent zero regardless of how hard you run the gun.
With your optics physically dialed in, keeping them powered through long range sessions becomes the next critical priority.
Power Management: Solar Integration vs. Battery Backup
Solar integration changes battery management by shifting the CR2032 from primary power source to emergency reserve. Under normal outdoor lighting, the solar panel carries the load entirely, so the battery sits idle and retains its charge for when you actually need it.
That distinction matters on a long range day. A standard battery-only red dot pulls from its CR2032 from the moment you switch it on. A solar-assisted optic like the Accufire QSO-S Solar Red Dot Sight ($129.99) offloads that draw whenever ambient light is sufficient, which is most of the time you're shooting outdoors.
How the Transition Works
The handoff between solar and battery isn't something you manage manually. The optic reads available light and pulls from the panel first. Drop into a shaded shooting position or move indoors, and the CR2032 picks up without any input from you.
This matters because the failure mode on battery-only setups is almost always gradual. Brightness sags before the dot fully dies, and you often don't notice until you're on the firing line. With solar backup in the loop, the battery stays fresher longer, so when it does carry the load, it's starting from a higher state of charge.
Practical Tradeoffs at the Range
Battery-only setups are simpler to troubleshoot. Dead dot? Swap the CR2032 and move on. Solar setups add a panel that can get obscured by a magnifier body if your mounting geometry puts the flip-to-side unit directly over the optic's solar strip. Check that clearance before you commit to a mount height.
This model also runs Shake Awake, which wakes the dot in milliseconds after a 4-minute static timeout. That feature reduces idle battery drain on both power modes, giving you more usable runtime whether you're running solar or straight battery.
Learn more about solar-backed red dots to see how hybrid power systems extend your operational runtime.
| Factor | Solar + CR2032 Backup | CR2032 Only |
|---|---|---|
| Battery drain during outdoor use | Low (panel carries load) | Continuous |
| Indoor/low-light reliability | Falls to battery automatically | Unaffected |
| Magnifier clearance concern | Yes, check panel obstruction | No |
| Troubleshooting simplicity | Moderate | Simple |
For most carbine shooters running extended range sessions in daylight, solar integration is a genuine advantage. Keep a spare CR2032 in your kit regardless. It weighs nothing and removes the one scenario where even a dual-power system can leave you dark.
Beyond just the power source, how your optic manages its downtime dictates whether it will be ready when you shoulder the rifle.
Shake Awake Latency: Why 4 Minutes Matters for Duty Use
Four minutes is the right timeout because it covers the gap between "carbine staged in a vehicle" and "carbine still burning battery in a safe for three days." A 10-minute window keeps the dot alive through most short stops, but it also means a rifle sitting in a patrol rack or gun safe overnight can cycle through dozens of unnecessary power-on periods before anyone touches it.
That parasitic drain adds up fast. A CR2032 running at moderate brightness loses measurable capacity after repeated partial-cycle wake events. The 4-minute static timeout on a duty-grade reflex sight cuts those cycles short without leaving you in a situation where the dot is still asleep when you shoulder the carbine under stress.
The wake response is the part that actually matters for duty readiness. The moment you pick up the rifle and drive it toward a target, motion triggers the dot before your cheek hits the stock. That recovery is fast enough that it doesn't register as a delay in a real presentation.
Battery management on a staged carbine is a real operational variable, not a spec-sheet footnote. An optic that sleeps aggressively but wakes instantly solves both sides of that problem.
The solar backup adds another layer here. Under ambient indoor light, the solar cell trickle-charges and reduces how often the CR2032 carries the full load. For a carbine that spends time near a window or under fluorescent range lighting, that matters across a 12-month deployment cycle.
How to Evaluate a Setup
A sound red dot magnifier combo comes down to three criteria: footprint compatibility, power management reliability, and transition speed under realistic handling conditions.
Footprint math comes first. Check each red dot against RMR, RMSc, and Picatinny mounting patterns. A sight that won't mount cleanly to a standard carbine rail isn't worth pursuing, regardless of other specs.
For power management, consider how the optic handles repeated Shake Awake cycles and how quickly it activates from cold sleep against the 4-minute auto-off threshold. On Accufire red dots, the CR2032 is rated at up to 20,000 hours of standby.
Transition speed is about flipping the magnifier to the side and reacquiring a 3 MOA dot at both close and extended distances. Setups that introduce parallax problems or require head repositioning are the ones to avoid.
Accufire red dots range from $119.99 up to $239.99 for solar-assisted variants, which keeps budget context realistic.
Key Takeaways
- Compatibility: Mount your red dot on an RMR-footprint base so the same optic works across carbine rail and handgun slide without re-zeroing each time.
- Battery life: A CR2032 with Shake Awake on a 4-minute sleep timer typically stretches past 20,000 hours of standby, making battery anxiety a non-issue on most range schedules.
- Mounting height: A lower-third co-witness height keeps your natural cheek weld intact when the magnifier flips out of the way for close work.
- Tradeoff: Flip-to-side magnifiers add roughly 10–12 oz to your carbine; budget that weight before stacking other accessories on the rail.
A Solid Starting Setup
Start with a 3 MOA red dot on a Picatinny-compatible base, zeroed at 50 yards. That zero gives you a usable 200-yard hold without dialing, and the 3 MOA dot stays precise enough for 100-yard paper work through a 3× magnifier.
Pair it with a flip-to-side magnifier mounted immediately behind the dot, positioned so your eye relief stays consistent at both 1× and 3×. Run the magnifier on the non-dominant side so the transition is one thumb push, not a grip break.
Pick a red dot with Shake Awake built in. Four minutes of stillness kills the dot; any movement brings it back fast. You stop babysitting brightness settings and start shooting.
Keep the setup honest about its limits. This combination handles 0–300 yards well. Past that, a dedicated variable scope earns its place instead.
About This Guide
This guide is written by the Accufire Editorial Team. Our goal is to provide practical advice on footprint math, transition speed, and power management to help you build a reliable, duty-ready rifle setup without the guesswork.